
Editing Photos✒️
- Semba Chabi
- Aug 19, 2022
- 2 min read

Photography is a fine art of capturing great moments in our lives, it unveils the subtleness and beauty of Mother nature but photography does not always end there. Photos can be further enhanced by editing with the help of productive tools. My personal favorite is Adobe Lightroom.
Adobe Lightroom is a free, powerful photo editor and camera app (on mobile) that empowers your photography, helping you capture and edit stunning images. It is has an advantage being available on both mobile and desktop that is Android, iOS, Windows and MacOS.
In this blog I will talk about how to enhance photos on Adobe Lightroom under the 'Light' tab.

The Tab contains various tools which are:
Exposure
Contrast
Highlights
Shadows
Blacks
Whites
Before all the editing begins, one must firstly import photos into the Lightroom app or use the built-in camera that automatically imports into the app for you.
Note: Use of built-in camera feature is only available on mobile.
EXPOSURE
Exposure controls the brightness of your photo. When the slider is moved to the left, the photo becomes darker and when the slider is moved to the right, the photo becomes brighter.

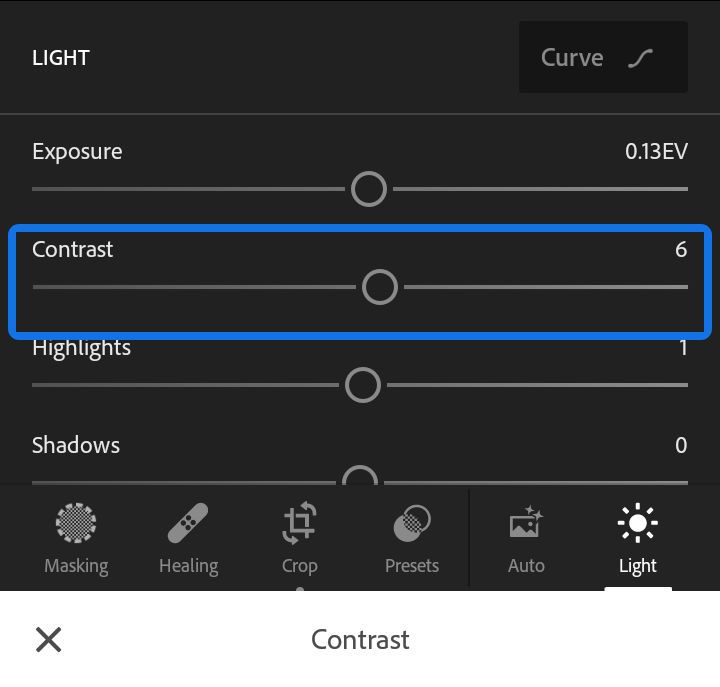
2. CONTRAST
Contrast is the difference in lightest portions of an image vs the darkest portions. The slider focuses on Tonal contrast, it determines the magnitude in contrast (difference) between light and dark parts. When the slider is moved to the the left, the contrast is flattened, and when it is moved the the right, the the contrast becomes greater or more dramatic. When it comes to Colour contrast, Complementary colours are used. Complementary colours are colours that are opposite to each other on the colour wheel e.g Blue and Orange; Red and Green etc.
3. HIGHLIGHTS
It controls the brightness of the lighter parts of your photo. Hence, when the slider is moved to the left, the highlights are darkened which inturn recovers detail and when it's moved to the right, the highlights are brightened causing reduction in detail.

4. SHADOWS
The shadows slider controls the brightness of the darker parts of your photo. When it is moved to the left, shadows are darkened or deepened and when moved to the right, shadows are brightned which recovers detail.

5. WHITES
The 'Whites' slider on the other hand sets the white point of the photo. When moved to the left, more colours appear completely white.

6. BLACKS
The 'Blacks' slider simply sets the black point of the photo. When moved to the left, more colours appear completely black. It does the opposite of what the white slider does.

That's all I have for you in this blog. Stay tuned as in my next blog I will talk about how to edit images under the 'Color' tab.
Good day✌🏼😉


Comments